UbuntuHelp:Lirc
来自Ubuntu中文
| 点击翻译: |
English |
请不要直接编辑翻译本页,本页将定期与来源同步。 |
- title Lirc
<<Include(Tag/Deletion)>> <<Include(Tag/Duplicate)>> <<Anchor(Top)>>
目录
What is LIRC ?
The LIRC application suite allows for control of your computer using your remote control. You can send X events to applications, start programs and much more by decoding and sending infra-red signals of many commonly used remote controls. Universal remote controls with learning modes are also supported. As installed, the default LIRC init scripts are properly setup to handle one receiver and possibly one transmitter. They can be adapted for additional receivers or transmitters, but the setup gets more complicated when doing this.
Installing/Configuring LIRC
The installation instructions on this page are valid for the following versions of Ubuntu and its corresponding recognized derivatives:
- Hardy 8.04.x LTS
- Intrepid 8.10
- Jaunty 9.04
- Karmic 9.10
- Lucid 10.04 LTS
Setup Repositories
In order to install lirc you will need to have the Universe component enabled.
See here for instructions on enabling these repositories.
Install Packages
On a system with a desktop environment the Synaptic Package Manager can be used to install the lirc package and its dependencies.
For terminal and command line only:
$ sudo apt-get install lirc
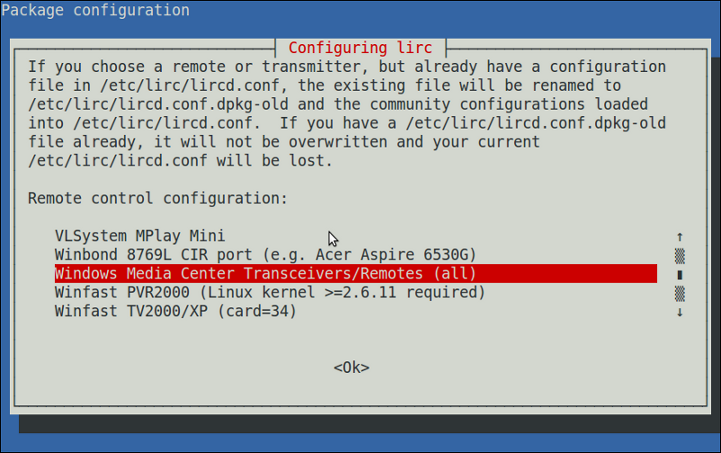
Choose Remote and Transmitter
Choose your remote and/or transmitter from the list provided upon installation. If your device is not listed, don't fret, you can still likely get support, but you should file a bug so that it can be fixed for future users. If your remote or transmitter isn't listed, choose "Custom"
 [[UbuntuHelp:[Top|Back to top]]]
Unlisted Remotes
If your remote isn't listed in the lirc installation, you should file a bug on Launchpad.
- For other remotes, a good place to start looking is the Lirc Website Remotes list.
- The online remote configuration tool LIRC Config also maintains a customizable database of lircd.conf's.
Replace /etc/lirc/lircd.conf with this lircd.conf that you have found or add an include line for it:
$ sudo cp <name of downloaded.conf> /etc/lirc
If you have found a remote, skip the next section. Otherwise, continue, and you will record a remote using irrecord.
Recording a Remote
Insert the module that you intend to record from. Example:
$ sudo modprobe lirc_mceusb2
- Record the remote using irrecord
$ sudo irrecord -d /dev/lirc0 lircd.conf
- Once you have completed your configuration, move this lircd.conf to /etc/lirc/lircd.conf
$ sudo mv lircd.conf /etc/lirc
- Add the modules for the remote to /etc/lirc/hardware.conf under MODULES
Adding support for more remotes
If you run into a situation where you think your remote "should" be working, but no /dev/lirc0 is being created, you may have to add the USB id to the LIRC source file. Follow these directions: 1. Start out by looking at lsusb output.
lsusb
Take note of the Vendor:Product IDs. 2. For the sake of this example, these are the IDs of the receiver we are trying:
0471:060d Philips
3. Install lirc-modules-source.
sudo apt-get install lirc-modules-source
4. Switch into the /usr/src/lirc-* and backup your driver.
cd /usr/src/lirc-*/lirc_mceusb2
cp lirc_mceusb2.c lirc_mceusb2.c.old
5. Edit the lirc_mceusb2.c file and add in your particulars. Scroll down to where the remotes are listed. If your vendor is not listed than you'll have to add that in. (eg define VENDOR_PHILIPS 0x0471)
NB. Philips is already listed as above. Now add in the particulars for your remote. In this case;
        /* Philips SRM5100 */
        { USB_DEVICE(VENDOR_PHILIPS, 0x060d) },
NB. Note from the code you noted down that the first bit is the vendor code (0471) and the second the remote id. (060d) 6. Now it's time to rebuild the modules. We'll start by clearing out the old one.
sudo dkms remove -m lirc -v 0.8.3~pre1 --all
7. Now it's time to build your new one.
sudo dkms add -m lirc -v 0.8.3~pre1
sudo dkms -m lirc -v 0.8.3~pre1 build
sudo dkms -m lirc -v 0.8.3~pre1 install
8. Update the modules and reinstall LIRC
sudo rmmod lirc_mceusb2
sudo modprobe lirc_mceusb2
sudo /etc/init.d/lirc restart
9. Test a few buttons.
irw
You should get output when you press a few buttons. 10. Make sure that you send a patch upstream to LIRC so that it can get into the next LIRC release. If you would like to also see it show up in the next Ubuntu release (in the case that LIRC upstream does very infrequent releases), then submit a bug to launchpad referencing the LIRC CVS commit. [[UbuntuHelp:[Top|Back to top]]]
Testing
To test if your remote is setup properly test it using this command:
$ irw
The terminal should 'appear' to hang, (not return a command prompt). Press buttons on your remote, you should see key presses then come up on the terminal. When you're done, testing press <crtl> + 'c' to quit. [[UbuntuHelp:[Top|Back to top]]]
.lircrc
This is the file responsible for storing the mappings of all of your remote buttons to your applications. The .lircrc file must be placed in the users home directory. Formatting for the .lircrc config file can be found here. Note: irexec will need to be restarted after any alterations of .lircrc in order for new changes to take effect. [[UbuntuHelp:[Top|Back to top]]]
irexec
The irexec application will need to be started in daemon mode at boot time. This can be accomplished by adding the entry irexec -d under the desktop menu System / Preferences / Startup Applications or System / Preferences / Sessions for earlier versions of Ubuntu.
[[UbuntuHelp:[Top|Back to top]]]
Re-configuring Lirc
To reconfigure lirc for another remote or incorrect settings, the following command can be issued at any time in a terminal
sudo dpkg-reconfigure lirc
[[UbuntuHelp:[Top|Back to top]]]
Re-starting Lirc
If at any point lirc needs a restart: For Karmic 9.10+
sudo service lirc restart
or for older versions of Ubuntu:
sudo /etc/init.d/lirc restart
[[UbuntuHelp:[Top|Back to top]]]
IR Transmitting
IR transmitters can be used to control external devices such as cable boxes or television sets. They are very useful in home theatre automation by reducing the number of remotes necessary to control your devices.
Supported Transmitting Devices
The following drivers have support for IR transmission:
- Serial IR Transmitter (Supported by lirc_serial module)
- Command IR Receiver / Quadruple Transmitter (Supported by lirc_cmdir module)
- Microsoft Media Center Remote Version 2 (Supported by lirc_mceusb2 module)
- Hauppauge PVR-150 (Supported by lirc_pvr150 module)
- USB-UIRT (Supported by native lircd binary)
Device Specific Setup
The following section outlines the specifics for setting up the different types of IR transmitters. After preparing the device specific items, proceed on to the general IR transmitter setup.
Serial IR Transmitter
Hardy packages will present you with questions related to what serial port you are using. Follow the dialogs and it will configure for serial port properly.
CommandIR IR Receiver and Quadruple-Transmitter
One site has automated the above procedure for their CommandIR Mini transceiver, which has a remote receiver and 4 IR blasters. The device's emitters allow control of multiple devices and do not require different codesets since each emitter can be individually selected for transmitting using irsend set_transmitters. It is possible to use their script to setup LIRC on Ubuntu for CommandIR then make minor modifications for other hardware.
MCEUSB2 IR Transmitter
Hardy packages include support for the mceusb2 IR transmitter.
PVR-150 IR Transmitter
firmware and codesets
You need to download the Hauppauge firmware and add the appropriate codeset to your lircd.conf for the device you want to control. The firmware can be found here. Download it and put it in ~+`/lib/firmware`+~ The codesets can be found here. This file contains the codesets for every device in the database. You will need to extract the information for the device you want to control, and append it to your /etc/lirc/lircd.conf -- but for now, just save it someplace safe. When you have downloaded and moved the firmware and have the codeset file, Reboot before continuing.
Adding the blaster codeset
You will need to determine the codeset of your device. To help you determine the possible codeset, consult the list here: here. Note that finding the correct codeset for your device can be tricky- but the master list can usually help you track them down by process of elimination.
Once you have determined a codeset, you need to extract those codes from the master file you downloaded and add them to your /etc/lirc/lircd.conf as another remote.
For example, to blast a Power Button a Motorola DCT6200 series cable box, you would use the POWER button raw code from codeset 85. If you are linking it to a key on your remote, you want to change the button name to the name reported by irw.
$ sudo nano /etc/lirc/lircd.conf
First, add the blaster header:
begin remote

  name          blaster
  bits          32
  flags         RAW_CODES
  eps           0
  aeps          0
  plead         0
  gap           333333
  repeat_bit    0
  begin raw_codes
Next, find the power button in codeset 85- since this is a cable box, it is prefixed in the master file as 0_85:
    name 0_85_KEY_POWER
    5570570
then make it conform to how irw reports the keypress- in this case, irw reports it as POWER, so that is what to name it:
   name POWER
   5570570
Keep adding your buttons (only the ones you want to control with the blaster). When you are finished, add:
end raw_codes
end remote
to close out that remote definition. In this example, the entire remote definition for the power button only looks like:
begin remote

  name          blaster
  bits          32
  flags         RAW_CODES
  eps           0
  aeps          0
  plead         0
  gap           333333
  repeat_bit    0
  begin raw_codes
  name 0_85_KEY_POWER
  5570570
 end raw_codes
end remote
After saving the new lircd.conf, restart lirc:
$ sudo /etc/init.d/lirc restart
and test it. In the example the command:
$ irsend SEND_ONCE blaster POWEROFF
turns the DCT6200 cable box on and off. Even if it does not control the device as intended, you should see the blaster flashing. Troubleshooting codeset selection, blaster placement, etc. is beyond the scope of this guide. A wealth of information is readily available via Google
General Setup & Usage
After completing the device specific setup for your transmitter, there are multiple steps that must be done for all remotes.
Append lircd.conf
You will need to find (or create) a lircd.conf that represents the remote that you will be transmitting. You can store a configuration for this remote anywhere on your system.
Simply modify the system wide file /etc/lirc/lircd.conf to add an extra "include" line with the entire path to the configuration. See the Unlisted Remotes section for more information on obtaining or recording a lircd.conf
Restart Lirc
sudo service lirc restart
or for older versions of Ubuntu
sudo /etc/init.d/lirc restart
Test transmission
This is the syntax for transmitting is as follows:
irsend -d $LIRCDPROCESS SEND_ONCE $REMOTE $BUTTON
- $LIRCDPROCESS represents the lircd device from /dev that you are using for the transmitting.
- $REMOTE represents the name of your remote as described in your
/etc/lirc/lircd.conf - $BUTTON represents the button that you are attempting to transmit.
Here is an example:
irsend -d /dev/lircd SEND_ONCE my_favorite_remote power
- This will transmit the power button from your remote entitled my_favorite_remote using the primary lircd process.
If the transmission isn't immediately working, the best method to start diagnosing is via a digital camera. Turn on the digital camera and via it's viewfinder look at the IR LED that you are attempting to transmit from. You should see a momentary bright purplish flash coming from the IR LED whenever you issue a transmit. If you don't see anything, your device is not transmitting. [[UbuntuHelp:[Top|Back to top]]]
See Also
- http://www.lirc.org/html/index.html (lirc manual)
- http://www.lirc.org/remotes/ (Supported Remotes)
- http://www.lirc.org/faq.html (Lirc FAQ)
[[UbuntuHelp:[Top|Back to top]]]