“UbuntuHelp:RecoveringUbuntuAfterInstallingWindows”的版本间的差异
来自Ubuntu中文
小 |
小 |
||
| 第2行: | 第2行: | ||
{{Languages|UbuntuHelp:RecoveringUbuntuAfterInstallingWindows}} | {{Languages|UbuntuHelp:RecoveringUbuntuAfterInstallingWindows}} | ||
<<Include(Tag/StyleCleanup)>> | <<Include(Tag/StyleCleanup)>> | ||
| − | This page documents how to restore or recover | + | This page documents how to restore or recover the boot-loader after installing Windows. Ubuntu uses the Grub bootloader; refer to the [[UbuntuHelp:GrubHowto|GrubHowto]] or [[UbuntuHelp:Grub2|Grub2]] for more information on Grub. Some reasons to repair your bootloader might include installing Microsoft Windows after you have installed Ubuntu, adding or removing a hard drive, or changing hard drive settings. |
| − | Some | + | Note: These instructions provide multiple options. Pick the option which works best for you; otherwise, choose recommended option. |
| − | == Using the Ubuntu Desktop/Live CD == | + | == Recovery Using the Ubuntu Desktop/Live CD (RECOMMENDED) == |
| − | === | + | === Introduction === |
| − | + | This method will install Grub bootloader into the [http://en.wikipedia.org/wiki/Master_boot_record Master Boot Record (MBR)] of the main computer hard drive. | |
| − | ====== | + | The slight complexity of this method consists of determining whether Ubuntu Operating System installed on your computer was configured for Grub or Grub 2. |
| − | ''' | + | * If you fresh-installed Ubuntu Karmic 9.10 or newer, you are running '''[[UbuntuHelp:Grub2|Grub2]]'''. |
| − | + | * If you ran previous version of Ubuntu and upgraded to Ubuntu Karmic 9.10, you are running '''[[UbuntuHelp:GrubHowto|Grub Legacy]]''' by default; unless you have executed upgrade-from-grub-legacy, then you are running '''[[UbuntuHelp:Grub2|Grub2]]'''. | |
| − | + | * If you are running Ubuntu Jaunty, you are running '''[[UbuntuHelp:GrubHowto|Grub Legacy]]'''. | |
| + | * If you are not sure, follow the guide assuming you are running Grub2 -- there will be a point to make a correction. | ||
| + | === Create and boot from a Live CD === | ||
| + | https://help.ubuntu.com/community/IconsPage?action=AttachFile&do=get&target=cd.png | ||
| + | * '''Grub2''': Download the latest version of Ubuntu Desktop edition from [http://www.ubuntu.com/GetUbuntu/download] and burn your Ubuntu CD. | ||
| + | * '''Grub Legacy''': Download Jaunty 9.04 version of Ubuntu Desktop from [http://releases.ubuntu.com/9.04/] and burn your Ubuntu CD. | ||
| + | Reboot your computer and boot into a live session. | ||
| + | Mount your Ubuntu partition from Places menu. | ||
| + | https://help.ubuntu.com/community/RecoveringUbuntuAfterInstallingWindows?action=AttachFile&do=get&target=Screenshot-Mount_Disk.png | ||
| + | === Are you using Grub or Grub 2? === | ||
| + | {|border="1" cellspacing="0" | ||
| + | |https://help.ubuntu.com/community/IconsPage?action=AttachFile&do=get&target=query.png||Skip this section if you are sure about your version of Grub | ||
| + | |} | ||
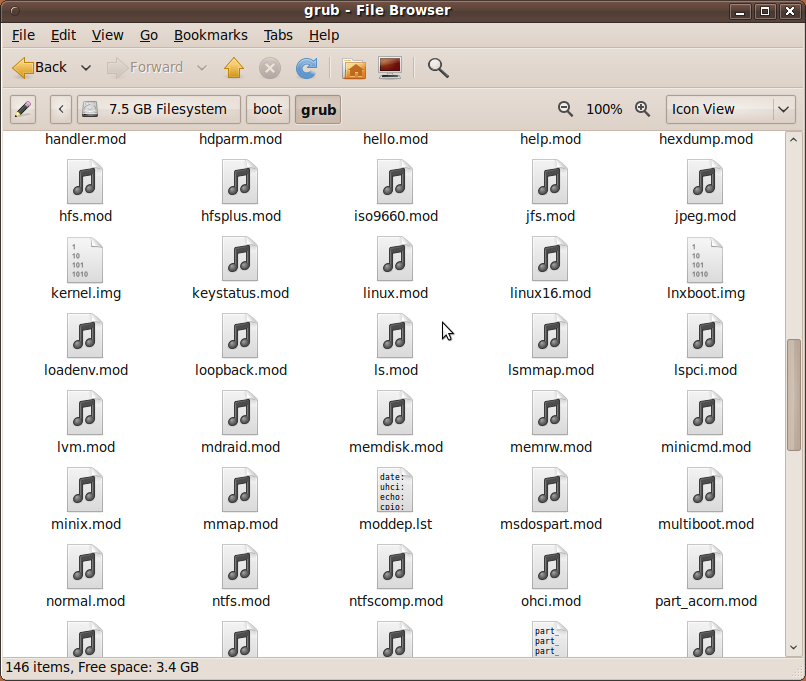
| + | Go into boot/grub directory and check for existances of files '''menu.lst''' and '''grub.cfg'''. | ||
| + | https://help.ubuntu.com/community/RecoveringUbuntuAfterInstallingWindows?action=AttachFile&do=get&target=Screenshot-grub-file-browser.png | ||
| + | * '''Grub Legacy''' uses '''boot/grub/menu.lst'''. | ||
| + | * '''Grub 2 uses''' uses '''boot/grub/grub.cfg'''. | ||
| + | If you are still not sure, view the file and check whether syntax follows [[UbuntuHelp:Grub2|Grub2]] conventions. | ||
| + | If you downloaded Ubuntu Karmic 9.10 Live CD, but your installed version of Ubuntu uses Grub Legacy, '''go back''' to the beginning and download Ubuntu Jaunty 9.04 CD. Continue with instructions for Grub Legacy. | ||
| + | === Overwriting the Master Boot Record === | ||
| + | {|border="1" cellspacing="0" | ||
| + | |https://help.ubuntu.com/community/IconsPage?action=AttachFile&do=get&target=IconWarning3.png||Existing MBR will be lost. In order to dual-boot your computer, we will be creating a new Master Boot Record to include all operating systems, including Ubuntu Linux and Microsoft Windows. This is to be expected. | ||
| + | |} | ||
| + | Your Ubuntu partition is now mounted. You will need to continue [[UbuntuHelp:UsingTheTerminal|Using the Terminal]]. | ||
| + | Verify if your partition is correct. | ||
<pre><nowiki> | <pre><nowiki> | ||
| − | + | mount | tail -1 | |
| − | + | ||
| − | + | ||
| − | + | ||
| − | + | ||
| − | + | ||
| − | + | ||
| − | + | ||
| − | + | ||
| − | + | ||
| − | + | ||
| − | + | ||
| − | + | ||
| − | + | ||
| − | + | ||
| − | + | ||
| − | + | ||
| − | + | ||
| − | + | ||
| − | + | ||
</nowiki></pre> | </nowiki></pre> | ||
| − | + | You should see output similar to this: | |
<pre><nowiki> | <pre><nowiki> | ||
| − | + | /dev/sda2 on /media/0d104aff-ec8c-44c8-b811-92b993823444 type ext4 (rw,nosuid,nodev,uhelper=devkit) | |
</nowiki></pre> | </nowiki></pre> | ||
| − | + | Note the designation for the disk <code><nowiki>/dev/sda</nowiki></code> which you will be using later, and the directory in /media. | |
| − | < | + | https://help.ubuntu.com/community/IconsPage?action=AttachFile&do=get&target=IconHint2.png Use Tab Completion in Terminal to complete the path. Hitting the <TAB> key will automatically finish file names, directory locations, and other long or hard to type file names. |
| − | + | To make sure this is indeed the Ubuntu boot partition, run <code><nowiki>ls /media/0d104aff-ec8c-44c8-b811-92b993823444/boot</nowiki></code>, substituting <code><nowiki>0d104aff-ec8c-44c8-b811-92b993823444</nowiki></code> with your volume's UUID from before, which should output something like this: | |
| − | + | ||
| − | + | ||
| − | </nowiki></ | + | |
| − | + | ||
| − | < | + | |
| − | + | ||
| − | </nowiki></ | + | |
| − | + | ||
<pre><nowiki> | <pre><nowiki> | ||
config-2.6.18-3-686 initrd.img-2.6.18-3-686.bak System.map-2.6.18-3-686 | config-2.6.18-3-686 initrd.img-2.6.18-3-686.bak System.map-2.6.18-3-686 | ||
| 第53行: | 第50行: | ||
initrd.img-2.6.18-3-686 memtest86+.bin | initrd.img-2.6.18-3-686 memtest86+.bin | ||
</nowiki></pre> | </nowiki></pre> | ||
| − | + | If what you have is not similar, unmount it and try another partition. | |
| − | Now that everything is mounted, we just need to reinstall GRUB: | + | Now that everything is mounted, we just need to reinstall GRUB by specifying the correct directory and the correct drive name: |
<pre><nowiki> | <pre><nowiki> | ||
| − | sudo grub-install --root-directory=/media/ | + | sudo grub-install --root-directory=/media/0d104aff-ec8c-44c8-b811-92b993823444 /dev/sda |
</nowiki></pre> | </nowiki></pre> | ||
If you get BIOS warnings try: | If you get BIOS warnings try: | ||
<pre><nowiki> | <pre><nowiki> | ||
| − | sudo grub-install --root-directory=/media/ | + | sudo grub-install --root-directory=/media/0d104aff-ec8c-44c8-b811-92b993823444 /dev/sda --recheck |
</nowiki></pre> | </nowiki></pre> | ||
| − | + | https://help.ubuntu.com/community/IconsPage?action=AttachFile&do=get&target=warning.png Replace /dev/sda with the location you want to install GRUB on. | |
| + | If all went well, you should see something like this: | ||
<pre><nowiki> | <pre><nowiki> | ||
Installation finished. No error reported. | Installation finished. No error reported. | ||
| 第71行: | 第69行: | ||
(hd0) /dev/sda | (hd0) /dev/sda | ||
</nowiki></pre> | </nowiki></pre> | ||
| − | Reboot, making sure to boot to your hard drive and not to the live CD. Grub should be installed and both Ubuntu and Windows should have been automatically detected. | + | Reboot, making sure to boot to your hard drive and not to the live CD. Grub should be installed and both Ubuntu and Windows should have been automatically detected and listed in the menu. |
| − | If, after installing grub, Windows does not appear in the boot menu, you will need to edit /boot/grub/menu.lst (That is a lowercase "L" and not the number 1 in menu.lst) | + | The Master Boot Record will execute Grub as the initial bootloader. The Windows bootloader is contained within the Windows partition and will then be chainloaded by the Grub bootloader. |
| + | ==== For Grub Legacy ==== | ||
| + | 1) Boot off the 9.04 [[UbuntuHelp:LiveCD|LiveCD]] | ||
| + | 2) Open a Terminal and type in the following commands, noting that the first command will put you into the grub “prompt”, and the next 3 commands will be executed there. Also note that hd0,0 implies the first hard drive and the first partition on that drive, which is where grub is installed by default. If yours differs, adjust accordingly. | ||
| + | <pre><nowiki> | ||
| + | sudo grub | ||
| + | |||
| + | > root (hd0,0) | ||
| + | |||
| + | > setup (hd0) | ||
| + | |||
| + | > exit | ||
| + | </nowiki></pre> | ||
| + | Grub has now been reinstalled to your MBR. | ||
| + | === Troubleshooting === | ||
| + | ==== I don't see a Grub menu ==== | ||
| + | If the menu is not normally displayed during boot, hold down the SHIFT key as the computer attempts to boot to display the GRUB 2 menu. | ||
| + | For Grub Legacy, use ESC key to display a menu. | ||
| + | ==== Grub comes up in shell mode with no boot menu ==== | ||
| + | You may have mixed up Grub Legacy and Grub 2. This symptom is most typical when you assumed you have Grub 2, but your Ubuntu OS actually uses Grub Legacy. Follow these instructions again using Ubuntu 9.04 Live CD. | ||
| + | If you are certain you have Grub 2 and it's still displaying shell mode by now, follow the method using chroot listed here... http://www.ubuntu-inside.me/2009/06/howto-recover-grub2-after-windows.html. | ||
| + | ==== What if Grub 2 does not list Windows ==== | ||
| + | If, after installing grub, Windows does not appear in the boot menu, boot into Ubuntu and execute command | ||
| + | <pre><nowiki> | ||
| + | sudo update-grub2 | ||
| + | </nowiki></pre> | ||
| + | ==== Grub 2 gives "error: no such device: xxxxx.xxxxx.xxxxx.xxxx" ==== | ||
| + | If at any time grub2 gives this error, boot up into Ubuntu (on hard disk if possible, otherwise with Live CD), open a terminal and run command | ||
| + | <pre><nowiki> | ||
| + | sudo update-grub2 | ||
| + | </nowiki></pre> | ||
| + | This should automatically detect the devices and configure grub appropriately. | ||
| + | ==== What if Grub Legacy misses Windows ==== | ||
| + | If, after installing grub, Windows does not appear in the boot menu, you will need to edit <code><nowiki>/boot/grub/menu.lst</nowiki></code> (That is a lowercase "L" and not the number 1 in menu.lst) | ||
Open a terminal and enter: | Open a terminal and enter: | ||
<pre><nowiki> | <pre><nowiki> | ||
| 第89行: | 第120行: | ||
</nowiki></pre> | </nowiki></pre> | ||
Note: Put your Windows stanza before or after AUTOMAGIC KERNEL LIST in the menu.lst | Note: Put your Windows stanza before or after AUTOMAGIC KERNEL LIST in the menu.lst | ||
| − | == | + | == Recovery using Microsoft Windows and Its Bootloader == |
| + | {|border="1" cellspacing="0" | ||
| + | |https://help.ubuntu.com/community/IconsPage?action=AttachFile&do=get&target=IconWarning3.png||If you have your Linux system in a second (or third...) hard disk this method will not work. Please check Super Grub Disk's method that address this problem. | ||
| + | |- | ||
| + | |||This method will also fail with Grub 2. | ||
| + | |} | ||
This method allows you to restore GRUB and keep the Windows bootloader as your primary bootloader. Thanks to Ubuntu's support for NTFS writing this method is now quite simple. | This method allows you to restore GRUB and keep the Windows bootloader as your primary bootloader. Thanks to Ubuntu's support for NTFS writing this method is now quite simple. | ||
The previous method puts GRUB back on the MBR (Master Boot Record) of the hard drive instead of in the root partition. Should you not wish to do so, for instance if you use a third-party boot manager like Boot Magic or System Commander, this next suggestion will be helpful. Another reason to prefer this method is for when restoring the Grub menu after a re-ghosting. In either case, use this alternative. | The previous method puts GRUB back on the MBR (Master Boot Record) of the hard drive instead of in the root partition. Should you not wish to do so, for instance if you use a third-party boot manager like Boot Magic or System Commander, this next suggestion will be helpful. Another reason to prefer this method is for when restoring the Grub menu after a re-ghosting. In either case, use this alternative. | ||
| − | + | === Restoring GRUB === | |
| − | + | 1. Boot from a Live CD, like Ubuntu Desktop, or similar. It is recommended to use Ubuntu 9.04 or newer as this has NTFS write support. | |
| − | 1. Boot from a Live CD, like Ubuntu | + | 2. Open a Terminal. Open a root terminal (For non-Ubuntu live CDs type <code><nowiki>su</nowiki></code> the terminal. For Ubuntu based distros run <code><nowiki>sudo -i</nowiki></code>) Enter root passwords as necessary. |
| − | 2. Open a Terminal. Open a root terminal (For non-Ubuntu live CDs type | + | 3. Type <code><nowiki>grub</nowiki></code> which makes a GRUB prompt appear. |
| − | 3. Type | + | 4. Type <code><nowiki>find /boot/grub/stage1</nowiki></code>. You'll get a response like "(hd0)" or in my case "(hd0,3)". Use the output from this command for the following commands. |
| − | 4. Type | + | |
'''Note:''' | '''Note:''' | ||
You should have mounted the partition which has your Linux system before typing this command. (e.g. In Knoppix Live CD partitions are shown on the desktop but they're not mounted until you double-click on them or mount them manually) | You should have mounted the partition which has your Linux system before typing this command. (e.g. In Knoppix Live CD partitions are shown on the desktop but they're not mounted until you double-click on them or mount them manually) | ||
| − | 5. Type | + | 5. Type <code><nowiki>root (hd0,3)</nowiki></code> note the space between root and (hd0,3). |
| − | 6. Type | + | 6. Type <code><nowiki>setup (hd0,3)</nowiki></code> into the prompt. This is key. Other instructions say to use "(hd0)", and that's fine if you want to write GRUB to the MBR. If you want to write it to your Linux root partition, then you want the number after the comma, such as "(hd0,3)". |
| − | 7. Type | + | 7. Type <code><nowiki>quit</nowiki></code> |
8. At this stage you can either restart the system and install your own bootloader, or you can continue and tell the Windows bootloader where to find GRUB which will handle booting Linux. | 8. At this stage you can either restart the system and install your own bootloader, or you can continue and tell the Windows bootloader where to find GRUB which will handle booting Linux. | ||
| − | + | === Making Windows Load GRUB (and then Linux) === | |
| − | This is taken from [ | + | This is taken from [http://www.geocities.com/epark/linux/grub-w2k-HOWTO.html Dual-Boot Linux and Windows 2000/Windows XP with GRUB HOWTO] which has been helping people dual boot since at least 2005. |
1. In Linux open a command window. | 1. In Linux open a command window. | ||
2. Mount a drive which you can share with Windows. This could be a USB drive, a FAT32 partition on your hard drive, or if you are using a Linux distribution which supports NTFS writing natively (Such as Ubuntu 8.04 or later) then you can mount the actual Windows C:\ drive itself! The advantage of writing to the Windows drive is that you are going to need to put a file there eventually, so it saves time copying a file around. For example: | 2. Mount a drive which you can share with Windows. This could be a USB drive, a FAT32 partition on your hard drive, or if you are using a Linux distribution which supports NTFS writing natively (Such as Ubuntu 8.04 or later) then you can mount the actual Windows C:\ drive itself! The advantage of writing to the Windows drive is that you are going to need to put a file there eventually, so it saves time copying a file around. For example: | ||
| 第116行: | 第151行: | ||
</nowiki></pre> | </nowiki></pre> | ||
However, when writing directly to the C:\ drive you could also do some damage to the system if you delete or move something. If you do pick the option to write directly, go in, put the file where it belongs, and touch NOTHING else. | However, when writing directly to the C:\ drive you could also do some damage to the system if you delete or move something. If you do pick the option to write directly, go in, put the file where it belongs, and touch NOTHING else. | ||
| − | 3. Now you are going to make a copy of your boot partition. Finding out what this is called is not always completely reliable since | + | 3. Now you are going to make a copy of your boot partition. Finding out what this is called is not always completely reliable since the Linux naming conventions differ from the GRUB naming conventions. Linux labels partitions as '''hd[Letter][Number]''' or '''sd[Letter][Number]''' whereas GRUB always names them as '''hd[Number][Number]'''. If you installed GRUB on (hd0,0), then the '''/boot''' partition will be on '''hda1''' or '''sda1'''. (Since (hd1,0) == hdb1 or sdb1, then by extension if you installed GRUB on (hd0,1) then the '''/boot''' partition will be on hda2 or sda2 and so on and so forth.) This narrows you down to two possibilities. If you now paste <code><nowiki>ls /dev |grep hd</nowiki></code> it will let you know if you have that drive on your machine. If nothing comes up which matches, then that means you must have an sd drive. |
'''Note:''' The command '''<code><nowiki>df</nowiki></code>''' won't work as you are booted from a Live CD. | '''Note:''' The command '''<code><nowiki>df</nowiki></code>''' won't work as you are booted from a Live CD. | ||
| 第122行: | 第157行: | ||
<code><nowiki>#dd if=/dev/sda2 of=/tmp/windows/linux.bin bs=512 count=1</nowiki></code> | <code><nowiki>#dd if=/dev/sda2 of=/tmp/windows/linux.bin bs=512 count=1</nowiki></code> | ||
| − | Looking at this example | + | Looking at this example <code><nowiki>/dev/sda2</nowiki></code> is your boot partition and <code><nowiki>/tmp/windows/</nowiki></code> is the drive you want to copy the boot sector image to. |
| − | 5. If you haven't created | + | 5. If you haven't created <code><nowiki>linux.bin</nowiki></code> in the Windows drive then you need to copy it there now. |
| − | 6. Next, reboot your computer and boot into Windows. Open | + | 6. Next, reboot your computer and boot into Windows. Open <code><nowiki>c:\boot.ini</nowiki></code> in Notepad, and add a new line at the bottom: |
<pre><nowiki> | <pre><nowiki> | ||
| 第130行: | 第165行: | ||
</nowiki></pre> | </nowiki></pre> | ||
This file might be write protected. If that is so, you need to enable writing to the file. To do so, right click, and from the context menu select Properties. Then uncheck the box that says "File is read only". Make sure to put that checkmark back afterwards. | This file might be write protected. If that is so, you need to enable writing to the file. To do so, right click, and from the context menu select Properties. Then uncheck the box that says "File is read only". Make sure to put that checkmark back afterwards. | ||
| − | Next, make sure that at the top of the | + | Next, make sure that at the top of the <code><nowiki>boot.ini</nowiki></code> file there is a <code><nowiki>timeout</nowiki></code> set, i.e <code><nowiki>timeout=5</nowiki></code> or some such number. |
| − | === | + | https://help.ubuntu.com/community/IconPage?action=AttachFile&do=get&target=IconWarning3.png |
Do not edit this file from the Live CD, even if you have NTFS write support. Linux and Windows represent line breaks in different ways, so even though you can edit the file, it won't add a new line. | Do not edit this file from the Live CD, even if you have NTFS write support. Linux and Windows represent line breaks in different ways, so even though you can edit the file, it won't add a new line. | ||
7. That's it, reboot and you will be given the option of booting into Linux, selecting that will chainload GRUB and this will let you boot into your Linux distro. | 7. That's it, reboot and you will be given the option of booting into Linux, selecting that will chainload GRUB and this will let you boot into your Linux distro. | ||
| − | Source: http://ubuntuforums.org/showpost.php?p=121355&postcount=5 | + | Source: [http://ubuntuforums.org/showpost.php?p=121355&postcount=5] |
| − | == | + | == Recovery Using the Unofficial "Super Grub Disk" == |
| − | + | ||
| − | + | ||
| − | + | ||
| − | + | ||
| − | + | ||
| − | + | ||
| − | + | ||
| − | + | ||
| − | + | ||
| − | + | ||
| − | + | ||
=== From within Windows === | === From within Windows === | ||
* Download [http://www.supergrubdisk.org/index.php?pid=12 Auto Super Grub Disk] | * Download [http://www.supergrubdisk.org/index.php?pid=12 Auto Super Grub Disk] | ||
| − | * | + | * Double-click '''auto_super_grub_disk_1.7''' icon, install it, and reboot. |
* On the next boot, select the '''UNetbootin-supergrubdisk''' menu entry; this will launch the Auto Super Grub Disk. | * On the next boot, select the '''UNetbootin-supergrubdisk''' menu entry; this will launch the Auto Super Grub Disk. | ||
| − | * | + | * Do nothing till you see your Grub menu again. |
* Next time you boot Windows, click yes when asked to remove UNetbootin-supergrubdisk to remove the Super Grub Disk menu entry. | * Next time you boot Windows, click yes when asked to remove UNetbootin-supergrubdisk to remove the Super Grub Disk menu entry. | ||
=== As a standalone cd/floppy/usb === | === As a standalone cd/floppy/usb === | ||
| 第158行: | 第182行: | ||
* Burn into a cdrom (better) or a floppy | * Burn into a cdrom (better) or a floppy | ||
* Boot from it | * Boot from it | ||
| − | * ''' | + | * Select: '''GRUB => MBR & !LINUX! (>2) MANUAL |8-) ''' |
| − | * | + | * Select the Linux or Grub installation you want to restore. |
* You see the message: SGD has done it! | * You see the message: SGD has done it! | ||
* Reboot | * Reboot | ||
| 第176行: | 第200行: | ||
* On the next boot, select the "UNetbootin-supergrubdisk" menu entry; this will launch the Super Grub Disk interface. | * On the next boot, select the "UNetbootin-supergrubdisk" menu entry; this will launch the Super Grub Disk interface. | ||
Then: | Then: | ||
| − | * ''' Super Grub Disk (WITH HELP) :-))) ''' | + | * Pick the ''' Super Grub Disk (WITH HELP) :-))) ''' option |
| − | * | + | * Select your language from the list |
| − | * ''' | + | * Choose ''' Windows ''' |
| − | * ''' | + | * Select: '''Windows chainloads Grub!''' |
| − | * | + | * Select the Linux or Grub installation you want to restore to its own partition. |
| − | * You see the message: SGD has done it! | + | * You see the message: ''' SGD has done it! ''' |
* Reboot | * Reboot | ||
* You're done. | * You're done. | ||
| − | == Using | + | == Recovery Using the Ubuntu Alternate/Install CD == |
| − | If you | + | This section explains how to rescue Grub, using the Ubuntu Alternate/install CD. |
| − | It | + | <ol><li>Enter your computers BIOS to check computer can boot from CD ROM. If you can boot from CD, insert CD ROM into drive. Exit the BIOS (if needed save your settings to make sure the computer boots from the CD ROM). |
| − | { | + | </li><li>When the Ubuntu splash screen comes up with the <code><nowiki>boot:</nowiki></code> prompt, type in <code><nowiki>rescue</nowiki></code> and press enter. |
| − | + | </li><li>Choose your language, location (country) and then keyboard layout as if you were doing a fresh install. | |
| + | </li><li>Enter a host name, or leave it with the default (Ubuntu). | ||
| + | </li><li>At this stage you are presented with a screen where you can select which partition is your root partition (there is a list of the partitions on your hard drive, so you are required to know which partition number Ubuntu is on). This will be <code><nowiki>dev/discs/disc0/partX</nowiki></code>, where the <code><nowiki>X</nowiki></code> is a partition number. | ||
| + | </li><li>you are then presented with a command prompt (a hash). | ||
| + | </li><li>type <code><nowiki>$ grub-install /dev/hdaX</nowiki></code> where X is your Ubuntu root install.</li></ol> | ||
| + | |||
| + | === The GUI Way: Using the Alternate/Install CD and Overwriting the Windows bootloader === | ||
| + | <ol><li>Boot your computer with the Ubuntu CD | ||
| + | </li><li>Go through the installation process until you reach "[!!!] Disk Partition" | ||
| + | </li><li>Select Manual Partition | ||
| + | </li><li>Mount your appropriate linux partitions:</li></ol> | ||
| + | |||
| + | */ | ||
| + | */boot | ||
| + | *swap | ||
| + | *... | ||
| + | <ol><li>'''DO NOT FORMAT THEM.''' | ||
| + | </li><li>Finish the manual partition | ||
| + | </li><li>Say "Yes" when it asks you to save the changes | ||
| + | </li><li>It will give you errors saying that "the system couldn't install ....." after that | ||
| + | </li><li>Ignore them, keep select "continue" until you get back to the Ubuntu installation menu | ||
| + | </li><li>Jump to "Install Grub ...." | ||
| + | </li><li>Once it is finished, just restart your computer</li></ol> | ||
| + | |||
| + | From: http://doc.gwos.org/index.php/Restore_Grub and http://ubuntuforums.org/showthread.php?t=76652 | ||
| + | == Recovery Using Third-Party Proprietary Software == | ||
| + | {|border="1" cellspacing="0" | ||
| + | |https://help.ubuntu.com/community/IconsPage?action=AttachFile&do=get&target=IconWarning3.png||This software runs only under Microsoft Windows. | ||
| + | |} | ||
| + | [http://neosmart.net/dl.php?id=1 EasyBCD] software allows Microsoft Windows users to boot into multiple operating systems, including Ubuntu Linux. | ||
== Troubleshooting == | == Troubleshooting == | ||
This section applies to... | This section applies to... | ||
| 第199行: | 第252行: | ||
* You have a [[UbuntuHelp:LiveCD|LiveCD]], such as the Ubuntu Desktop CD or the Knoppix Live CD | * You have a [[UbuntuHelp:LiveCD|LiveCD]], such as the Ubuntu Desktop CD or the Knoppix Live CD | ||
* You're familiar enough with your [[UbuntuHelp:LiveCD|LiveCD]] to gain access to a console | * You're familiar enough with your [[UbuntuHelp:LiveCD|LiveCD]] to gain access to a console | ||
| − | * You remember how you set up your partitions (having a printout of | + | * You remember how you set up your partitions (having a printout of <code><nowiki>/etc/fstab</nowiki></code> is ideal, though you can make do with the output of <code><nowiki>fdisk -l /dev/hda</nowiki></code>) |
* Knowledge of how your kernel works (specifically with regards to initrd), if you're using a non-Ubuntu kernel or you have built your own | * Knowledge of how your kernel works (specifically with regards to initrd), if you're using a non-Ubuntu kernel or you have built your own | ||
* Your kernel's version; this howto assumes 2.6.10-5-386 | * Your kernel's version; this howto assumes 2.6.10-5-386 | ||
| 第216行: | 第269行: | ||
</nowiki></pre> | </nowiki></pre> | ||
Now that you have root access, you need to mount the partition(s) containing your bootloader files. | Now that you have root access, you need to mount the partition(s) containing your bootloader files. | ||
| − | You will need access to both your | + | You will need access to both your <code><nowiki>/sbin/</nowiki></code> and <code><nowiki>/boot/</nowiki></code> directories. If you have a <code><nowiki>/boot/</nowiki></code> listing in your <code><nowiki>fstab</nowiki></code>, you are among those who will need to mount two partitions. |
Begin by creating a mount point for your working environment -- you'll notice this is the same as creating a directory. | Begin by creating a mount point for your working environment -- you'll notice this is the same as creating a directory. | ||
<pre><nowiki> | <pre><nowiki> | ||
mkdir /mnt/work | mkdir /mnt/work | ||
</nowiki></pre> | </nowiki></pre> | ||
| − | If you need to mount | + | If you need to mount <code><nowiki>/boot/</nowiki></code>, too, run the following command. |
<pre><nowiki> | <pre><nowiki> | ||
mkdir /mnt/work/boot | mkdir /mnt/work/boot | ||
</nowiki></pre> | </nowiki></pre> | ||
| − | Now it's time to actually load your filesystem data. Review your | + | Now it's time to actually load your filesystem data. Review your <code><nowiki>fstab</nowiki></code> and identify the location(s) of <code><nowiki>/</nowiki></code> and <code><nowiki>/boot/</nowiki></code>; these will likely look something like <code><nowiki>/dev/hda3</nowiki></code> and <code><nowiki>/dev/hda4</nowiki></code>, though the letter 'a' and the numbers 3 and 4 may differ. |
| − | '''Note''': For the remainder of this howto, | + | '''Note''': For the remainder of this howto, <code><nowiki>/dev/hda3</nowiki></code> and <code><nowiki>/dev/hda4</nowiki></code> will be assumed, so alter them as needed when typing them in yourself. |
Enter the following commands to load your filesystem and some information GRUB may need. | Enter the following commands to load your filesystem and some information GRUB may need. | ||
<pre><nowiki> | <pre><nowiki> | ||
| 第240行: | 第293行: | ||
'''Warning''': From this point on, any files you modify will affect your Ubuntu system. You have left the safety of the [[UbuntuHelp:LiveCD|LiveCD]]. Exercise caution. | '''Warning''': From this point on, any files you modify will affect your Ubuntu system. You have left the safety of the [[UbuntuHelp:LiveCD|LiveCD]]. Exercise caution. | ||
==== Recovering GRUB Automatically ==== | ==== Recovering GRUB Automatically ==== | ||
| − | If you have a separate | + | If you have a separate <code><nowiki>/boot/</nowiki></code> partition, type the following line. |
<pre><nowiki> | <pre><nowiki> | ||
sudo mount /dev/hda3 /boot/ | sudo mount /dev/hda3 /boot/ | ||
| 第252行: | 第305行: | ||
Before you can undertake the next step, it's important that you understand how GRUB identifies partitions. | Before you can undertake the next step, it's important that you understand how GRUB identifies partitions. | ||
To GRUB, numbers begin with 0, and letters are expressed numerically, also beginning with 0. | To GRUB, numbers begin with 0, and letters are expressed numerically, also beginning with 0. | ||
| − | For example, | + | For example, <code><nowiki>/dev/hda1</nowiki></code> is "hd0,0" to GRUB. |
| − | Similarly, | + | Similarly, <code><nowiki>/dev/hdb3</nowiki></code> is "hd1,2". |
| − | '''Note''': The "root" line must point to the location of your | + | '''Note''': The "root" line must point to the location of your <code><nowiki>/boot/</nowiki></code> partition if you have one. If you do not have one, point it at your <code><nowiki>/</nowiki></code> partition. |
<pre><nowiki> | <pre><nowiki> | ||
sudo /sbin/grub | sudo /sbin/grub | ||
| 第262行: | 第315行: | ||
</nowiki></pre> | </nowiki></pre> | ||
==== Configuring the GRUB Menu ==== | ==== Configuring the GRUB Menu ==== | ||
| − | '''Note''': This step does not need to be done if you're just trying to recover your MBR. Installing Windows will not alter the contents of your existing | + | '''Note''': This step does not need to be done if you're just trying to recover your MBR. Installing Windows will not alter the contents of your existing <code><nowiki>menu.lst</nowiki></code>, so if everything was working right before, everything will continue to work right now, and you can restart your computer. |
| − | Open the GRUB menu file, | + | Open the GRUB menu file, <code><nowiki>/boot/grub/menu.lst</nowiki></code>, with your favourite text editor. An example follows. |
<pre><nowiki> | <pre><nowiki> | ||
sudo nano /boot/grub/menu.lst | sudo nano /boot/grub/menu.lst | ||
</nowiki></pre> | </nowiki></pre> | ||
| − | '''Note''': Your | + | '''Note''': Your <code><nowiki>menu.lst</nowiki></code> file is used to control the operating systems GRUB displays on startup, as well as its visual appearance. This howto will only explain how to get your operating systems to boot, it will not tell you how to make your bootloader pretty. |
| − | A sample | + | A sample <code><nowiki>menu.lst</nowiki></code>, stripped of unnecessary comments, appears below. It is based on the <code><nowiki>/dev/hda3</nowiki></code> and <code><nowiki>/dev/hda4</nowiki></code> example above, and assumes Windows resides at <code><nowiki>/dev/hda1</nowiki></code>. |
<pre><nowiki> | <pre><nowiki> | ||
timeout 5 #The number of seconds GRUB should wait before booting an OS | timeout 5 #The number of seconds GRUB should wait before booting an OS | ||
| 第294行: | 第347行: | ||
</nowiki></pre> | </nowiki></pre> | ||
And that's it. Save and close the file, then reboot and try out the entries. | And that's it. Save and close the file, then reboot and try out the entries. | ||
| − | |||
| − | |||
| − | |||
| − | |||
| − | |||
| − | |||
| − | |||
| − | |||
| − | |||
| − | |||
| − | |||
| − | |||
| − | |||
| − | |||
| − | |||
| − | |||
| − | |||
| − | |||
| − | |||
| − | |||
| − | |||
| − | |||
| − | |||
| − | |||
| − | |||
| − | |||
| − | |||
| − | |||
| − | |||
| − | |||
== GRUB Resources == | == GRUB Resources == | ||
* [http://www.gnu.org/software/grub/manual/html_node/ GRUB Manual] | * [http://www.gnu.org/software/grub/manual/html_node/ GRUB Manual] | ||
* [http://www.gnu.org/software/grub GRUB homepage] | * [http://www.gnu.org/software/grub GRUB homepage] | ||
| − | * [http://grub.enbug.org/ | + | * [http://grub.enbug.org/ GRUB wiki] |
| + | * [[UbuntuHelp:WindowsDualBoot#1._Recovering_GRUB_after_reinstalling_Windows|| Recovering grub]] after installing Windows to dual-boot | ||
* [http://tldp.org/HOWTO/Linux+Win9x+Grub-HOWTO/index.html Linux+Win+Grub HowTo] | * [http://tldp.org/HOWTO/Linux+Win9x+Grub-HOWTO/index.html Linux+Win+Grub HowTo] | ||
* [http://www.supergrubdisk.org/ Super Grub Disk] - Ready to go cdrom or floppy that restores Grub on MBR automatically | * [http://www.supergrubdisk.org/ Super Grub Disk] - Ready to go cdrom or floppy that restores Grub on MBR automatically | ||
* [https://gna.org/projects/grub4dos/ GRUB for DOS] | * [https://gna.org/projects/grub4dos/ GRUB for DOS] | ||
---- | ---- | ||
| − | [[category:CategoryLive]] [[category:CategoryBackupRecovery]] [[category:CategoryBootAndPartition]] | + | [[category:CategoryLive]] [[category:CategoryBackupRecovery]] [[category:CategoryBootAndPartition]] [[category:CategoryInstallation]] |
[[category:UbuntuHelp]] | [[category:UbuntuHelp]] | ||
2010年5月20日 (四) 00:01的最新版本
<<Include(Tag/StyleCleanup)>>
This page documents how to restore or recover the boot-loader after installing Windows. Ubuntu uses the Grub bootloader; refer to the GrubHowto or Grub2 for more information on Grub. Some reasons to repair your bootloader might include installing Microsoft Windows after you have installed Ubuntu, adding or removing a hard drive, or changing hard drive settings.
Note: These instructions provide multiple options. Pick the option which works best for you; otherwise, choose recommended option.
目录
- 1 Recovery Using the Ubuntu Desktop/Live CD (RECOMMENDED)
- 2 Recovery using Microsoft Windows and Its Bootloader
- 3 Recovery Using the Unofficial "Super Grub Disk"
- 4 Recovery Using the Ubuntu Alternate/Install CD
- 5 Recovery Using Third-Party Proprietary Software
- 6 Troubleshooting
- 7 GRUB Resources
Recovery Using the Ubuntu Desktop/Live CD (RECOMMENDED)
Introduction
This method will install Grub bootloader into the Master Boot Record (MBR) of the main computer hard drive. The slight complexity of this method consists of determining whether Ubuntu Operating System installed on your computer was configured for Grub or Grub 2.
- If you fresh-installed Ubuntu Karmic 9.10 or newer, you are running Grub2.
- If you ran previous version of Ubuntu and upgraded to Ubuntu Karmic 9.10, you are running Grub Legacy by default; unless you have executed upgrade-from-grub-legacy, then you are running Grub2.
- If you are running Ubuntu Jaunty, you are running Grub Legacy.
- If you are not sure, follow the guide assuming you are running Grub2 -- there will be a point to make a correction.
Create and boot from a Live CD

- Grub2: Download the latest version of Ubuntu Desktop edition from [1] and burn your Ubuntu CD.
- Grub Legacy: Download Jaunty 9.04 version of Ubuntu Desktop from [2] and burn your Ubuntu CD.
Reboot your computer and boot into a live session.
Mount your Ubuntu partition from Places menu.

Are you using Grub or Grub 2?
 |
Skip this section if you are sure about your version of Grub |
Go into boot/grub directory and check for existances of files menu.lst and grub.cfg.
- Grub Legacy uses boot/grub/menu.lst.
- Grub 2 uses uses boot/grub/grub.cfg.
If you are still not sure, view the file and check whether syntax follows Grub2 conventions. If you downloaded Ubuntu Karmic 9.10 Live CD, but your installed version of Ubuntu uses Grub Legacy, go back to the beginning and download Ubuntu Jaunty 9.04 CD. Continue with instructions for Grub Legacy.
Overwriting the Master Boot Record
 |
Existing MBR will be lost. In order to dual-boot your computer, we will be creating a new Master Boot Record to include all operating systems, including Ubuntu Linux and Microsoft Windows. This is to be expected. |
Your Ubuntu partition is now mounted. You will need to continue Using the Terminal. Verify if your partition is correct.
mount | tail -1
You should see output similar to this:
/dev/sda2 on /media/0d104aff-ec8c-44c8-b811-92b993823444 type ext4 (rw,nosuid,nodev,uhelper=devkit)
Note the designation for the disk /dev/sda which you will be using later, and the directory in /media.
 Use Tab Completion in Terminal to complete the path. Hitting the <TAB> key will automatically finish file names, directory locations, and other long or hard to type file names.
To make sure this is indeed the Ubuntu boot partition, run
Use Tab Completion in Terminal to complete the path. Hitting the <TAB> key will automatically finish file names, directory locations, and other long or hard to type file names.
To make sure this is indeed the Ubuntu boot partition, run ls /media/0d104aff-ec8c-44c8-b811-92b993823444/boot, substituting 0d104aff-ec8c-44c8-b811-92b993823444 with your volume's UUID from before, which should output something like this:
config-2.6.18-3-686      initrd.img-2.6.18-3-686.bak  System.map-2.6.18-3-686
grub                     lost+found                   vmlinuz-2.6.18-3-686
initrd.img-2.6.18-3-686  memtest86+.bin
If what you have is not similar, unmount it and try another partition. Now that everything is mounted, we just need to reinstall GRUB by specifying the correct directory and the correct drive name:
sudo grub-install --root-directory=/media/0d104aff-ec8c-44c8-b811-92b993823444 /dev/sda
If you get BIOS warnings try:
sudo grub-install --root-directory=/media/0d104aff-ec8c-44c8-b811-92b993823444 /dev/sda --recheck
 Replace /dev/sda with the location you want to install GRUB on.
If all went well, you should see something like this:
Replace /dev/sda with the location you want to install GRUB on.
If all went well, you should see something like this:
Installation finished. No error reported.
This is the contents of the device map /boot/grub/device.map.
Check if this is correct or not. If any of the lines is incorrect,
fix it and re-run the script `grub-install'.

(hd0)   /dev/sda
Reboot, making sure to boot to your hard drive and not to the live CD. Grub should be installed and both Ubuntu and Windows should have been automatically detected and listed in the menu. The Master Boot Record will execute Grub as the initial bootloader. The Windows bootloader is contained within the Windows partition and will then be chainloaded by the Grub bootloader.
For Grub Legacy
1) Boot off the 9.04 LiveCD 2) Open a Terminal and type in the following commands, noting that the first command will put you into the grub “prompt”, and the next 3 commands will be executed there. Also note that hd0,0 implies the first hard drive and the first partition on that drive, which is where grub is installed by default. If yours differs, adjust accordingly.
sudo grub

> root (hd0,0)

> setup (hd0)

> exit
Grub has now been reinstalled to your MBR.
Troubleshooting
If the menu is not normally displayed during boot, hold down the SHIFT key as the computer attempts to boot to display the GRUB 2 menu. For Grub Legacy, use ESC key to display a menu.
You may have mixed up Grub Legacy and Grub 2. This symptom is most typical when you assumed you have Grub 2, but your Ubuntu OS actually uses Grub Legacy. Follow these instructions again using Ubuntu 9.04 Live CD. If you are certain you have Grub 2 and it's still displaying shell mode by now, follow the method using chroot listed here... http://www.ubuntu-inside.me/2009/06/howto-recover-grub2-after-windows.html.
What if Grub 2 does not list Windows
If, after installing grub, Windows does not appear in the boot menu, boot into Ubuntu and execute command
sudo update-grub2
Grub 2 gives "error: no such device: xxxxx.xxxxx.xxxxx.xxxx"
If at any time grub2 gives this error, boot up into Ubuntu (on hard disk if possible, otherwise with Live CD), open a terminal and run command
sudo update-grub2
This should automatically detect the devices and configure grub appropriately.
What if Grub Legacy misses Windows
If, after installing grub, Windows does not appear in the boot menu, you will need to edit /boot/grub/menu.lst (That is a lowercase "L" and not the number 1 in menu.lst)
Open a terminal and enter:
gksu gedit /boot/grub/menu.lst
Or, in Kubuntu:
kdesu kate /boot/grub/menu.lst
Your Windows stanza should look something like this:
title Windows XP/Vista # Use any title you wish, it will appear in the grub boot menu
rootnoverify (hd0,0) # This is the location of the windows partition
makeactive
chainloader +1
Note: Put your Windows stanza before or after AUTOMAGIC KERNEL LIST in the menu.lst
Recovery using Microsoft Windows and Its Bootloader
|
If you have your Linux system in a second (or third...) hard disk this method will not work. Please check Super Grub Disk's method that address this problem. |
| This method will also fail with Grub 2. |
This method allows you to restore GRUB and keep the Windows bootloader as your primary bootloader. Thanks to Ubuntu's support for NTFS writing this method is now quite simple. The previous method puts GRUB back on the MBR (Master Boot Record) of the hard drive instead of in the root partition. Should you not wish to do so, for instance if you use a third-party boot manager like Boot Magic or System Commander, this next suggestion will be helpful. Another reason to prefer this method is for when restoring the Grub menu after a re-ghosting. In either case, use this alternative.
Restoring GRUB
1. Boot from a Live CD, like Ubuntu Desktop, or similar. It is recommended to use Ubuntu 9.04 or newer as this has NTFS write support.
2. Open a Terminal. Open a root terminal (For non-Ubuntu live CDs type su the terminal. For Ubuntu based distros run sudo -i) Enter root passwords as necessary.
3. Type grub which makes a GRUB prompt appear.
4. Type find /boot/grub/stage1. You'll get a response like "(hd0)" or in my case "(hd0,3)". Use the output from this command for the following commands.
Note:
You should have mounted the partition which has your Linux system before typing this command. (e.g. In Knoppix Live CD partitions are shown on the desktop but they're not mounted until you double-click on them or mount them manually)
5. Type root (hd0,3) note the space between root and (hd0,3).
6. Type setup (hd0,3) into the prompt. This is key. Other instructions say to use "(hd0)", and that's fine if you want to write GRUB to the MBR. If you want to write it to your Linux root partition, then you want the number after the comma, such as "(hd0,3)".
7. Type quit
8. At this stage you can either restart the system and install your own bootloader, or you can continue and tell the Windows bootloader where to find GRUB which will handle booting Linux.
Making Windows Load GRUB (and then Linux)
This is taken from Dual-Boot Linux and Windows 2000/Windows XP with GRUB HOWTO which has been helping people dual boot since at least 2005. 1. In Linux open a command window. 2. Mount a drive which you can share with Windows. This could be a USB drive, a FAT32 partition on your hard drive, or if you are using a Linux distribution which supports NTFS writing natively (Such as Ubuntu 8.04 or later) then you can mount the actual Windows C:\ drive itself! The advantage of writing to the Windows drive is that you are going to need to put a file there eventually, so it saves time copying a file around. For example:
#mkdir /tmp/windows
#mount /dev/sda1 /tmp/windows
However, when writing directly to the C:\ drive you could also do some damage to the system if you delete or move something. If you do pick the option to write directly, go in, put the file where it belongs, and touch NOTHING else.
3. Now you are going to make a copy of your boot partition. Finding out what this is called is not always completely reliable since the Linux naming conventions differ from the GRUB naming conventions. Linux labels partitions as hd[Letter][Number] or sd[Letter][Number] whereas GRUB always names them as hd[Number][Number]. If you installed GRUB on (hd0,0), then the /boot partition will be on hda1 or sda1. (Since (hd1,0) == hdb1 or sdb1, then by extension if you installed GRUB on (hd0,1) then the /boot partition will be on hda2 or sda2 and so on and so forth.) This narrows you down to two possibilities. If you now paste ls /dev |grep hd it will let you know if you have that drive on your machine. If nothing comes up which matches, then that means you must have an sd drive.
Note: The command df won't work as you are booted from a Live CD.
4. Having determined your boot partition run this command as root:
#dd if=/dev/sda2 of=/tmp/windows/linux.bin bs=512 count=1
Looking at this example /dev/sda2 is your boot partition and /tmp/windows/ is the drive you want to copy the boot sector image to.
5. If you haven't created linux.bin in the Windows drive then you need to copy it there now.
6. Next, reboot your computer and boot into Windows. Open c:\boot.ini in Notepad, and add a new line at the bottom:
c:\linux.bin="Linux"
This file might be write protected. If that is so, you need to enable writing to the file. To do so, right click, and from the context menu select Properties. Then uncheck the box that says "File is read only". Make sure to put that checkmark back afterwards.
Next, make sure that at the top of the boot.ini file there is a timeout set, i.e timeout=5 or some such number.
 Do not edit this file from the Live CD, even if you have NTFS write support. Linux and Windows represent line breaks in different ways, so even though you can edit the file, it won't add a new line.
7. That's it, reboot and you will be given the option of booting into Linux, selecting that will chainload GRUB and this will let you boot into your Linux distro.
Do not edit this file from the Live CD, even if you have NTFS write support. Linux and Windows represent line breaks in different ways, so even though you can edit the file, it won't add a new line.
7. That's it, reboot and you will be given the option of booting into Linux, selecting that will chainload GRUB and this will let you boot into your Linux distro.
Source: [3]
Recovery Using the Unofficial "Super Grub Disk"
From within Windows
- Download Auto Super Grub Disk
- Double-click auto_super_grub_disk_1.7 icon, install it, and reboot.
- On the next boot, select the UNetbootin-supergrubdisk menu entry; this will launch the Auto Super Grub Disk.
- Do nothing till you see your Grub menu again.
- Next time you boot Windows, click yes when asked to remove UNetbootin-supergrubdisk to remove the Super Grub Disk menu entry.
As a standalone cd/floppy/usb
- Download Super Grub Disk
- Burn into a cdrom (better) or a floppy
- Boot from it
- Select: GRUB => MBR & !LINUX! (>2) MANUAL |8-)
- Select the Linux or Grub installation you want to restore.
- You see the message: SGD has done it!
- Reboot
- You're done.
Preserving Windows Bootloader
The method shown above puts GRUB back on the MBR (Master Boot Record) of the hard drive instead of in the root partition. If you use a third-party boot manager like Boot Magic or System Commander you probably won't want to do that. This method could also be used to restore the Grub menu after a re-ghosting. If this is the case, use this alternative. NOTE: This alternative, used without a third-party boot manager, will not cause Ubuntu to boot. This method will let you boot your second hard disk Linux installations from Windows while the Using the Ubuntu Desktop/Live CD. Preserving Windows Bootloader instructions will not. Either:
- Download Super Grub Disk
- Burn into a cdrom (suggested) or a floppy
- Boot from it
Or:
- Download UNetbootin Super Grub Disk Loader (Windows .exe version)
- Run the installer and reboot when once done installing.
- On the next boot, select the "UNetbootin-supergrubdisk" menu entry; this will launch the Super Grub Disk interface.
Then:
- Pick the Super Grub Disk (WITH HELP) :-))) option
- Select your language from the list
- Choose Windows
- Select: Windows chainloads Grub!
- Select the Linux or Grub installation you want to restore to its own partition.
- You see the message: SGD has done it!
- Reboot
- You're done.
Recovery Using the Ubuntu Alternate/Install CD
This section explains how to rescue Grub, using the Ubuntu Alternate/install CD.
- Enter your computers BIOS to check computer can boot from CD ROM. If you can boot from CD, insert CD ROM into drive. Exit the BIOS (if needed save your settings to make sure the computer boots from the CD ROM).
- When the Ubuntu splash screen comes up with the
boot:prompt, type inrescueand press enter. - Choose your language, location (country) and then keyboard layout as if you were doing a fresh install.
- Enter a host name, or leave it with the default (Ubuntu).
- At this stage you are presented with a screen where you can select which partition is your root partition (there is a list of the partitions on your hard drive, so you are required to know which partition number Ubuntu is on). This will be
dev/discs/disc0/partX, where theXis a partition number. - you are then presented with a command prompt (a hash).
- type
$ grub-install /dev/hdaXwhere X is your Ubuntu root install.
The GUI Way: Using the Alternate/Install CD and Overwriting the Windows bootloader
- Boot your computer with the Ubuntu CD
- Go through the installation process until you reach "[!!!] Disk Partition"
- Select Manual Partition
- Mount your appropriate linux partitions:
- /
- /boot
- swap
- ...
- DO NOT FORMAT THEM.
- Finish the manual partition
- Say "Yes" when it asks you to save the changes
- It will give you errors saying that "the system couldn't install ....." after that
- Ignore them, keep select "continue" until you get back to the Ubuntu installation menu
- Jump to "Install Grub ...."
- Once it is finished, just restart your computer
From: http://doc.gwos.org/index.php/Restore_Grub and http://ubuntuforums.org/showthread.php?t=76652
Recovery Using Third-Party Proprietary Software
|
This software runs only under Microsoft Windows. |
EasyBCD software allows Microsoft Windows users to boot into multiple operating systems, including Ubuntu Linux.
Troubleshooting
This section applies to...
- Dual-boot setups in which Windows was installed after Ubuntu
- Conditions where Windows failure forced a re-installation
- Windows recovery techniques involving the "restoration" of the MBR
- Cases where GRUB failed to install
Prerequisites:
- Your Ubuntu partitions are all still intact
- You have a LiveCD, such as the Ubuntu Desktop CD or the Knoppix Live CD
- You're familiar enough with your LiveCD to gain access to a console
- You remember how you set up your partitions (having a printout of
/etc/fstabis ideal, though you can make do with the output offdisk -l /dev/hda) - Knowledge of how your kernel works (specifically with regards to initrd), if you're using a non-Ubuntu kernel or you have built your own
- Your kernel's version; this howto assumes 2.6.10-5-386
Preparing Your Working Environment
To begin the restoration procedure, insert your LiveCD and reboot your computer. Proceed with your LiveCD's bootup procedure until you are presented with an interface. If your LiveCD does not immediately present you with a console, also called a terminal, open one -- to do this with the Ubuntu LiveCD, click Applications -> System Tools -> Terminal. Note: Since this is a LiveCD environment, any changes to user accounts or filesystem layouts at this level will not be permanent. This means you can set a temporary root password and create directories without affecting your actual installation. Now, you need to gain root access. Under Ubuntu, this can be done with the following commands:
sudo -i
Under Knoppix, the following command will suffice, and you will not be prompted for a password.
su -
Now that you have root access, you need to mount the partition(s) containing your bootloader files.
You will need access to both your /sbin/ and /boot/ directories. If you have a /boot/ listing in your fstab, you are among those who will need to mount two partitions.
Begin by creating a mount point for your working environment -- you'll notice this is the same as creating a directory.
mkdir /mnt/work
If you need to mount /boot/, too, run the following command.
mkdir /mnt/work/boot
Now it's time to actually load your filesystem data. Review your fstab and identify the location(s) of / and /boot/; these will likely look something like /dev/hda3 and /dev/hda4, though the letter 'a' and the numbers 3 and 4 may differ.
Note: For the remainder of this howto, /dev/hda3 and /dev/hda4 will be assumed, so alter them as needed when typing them in yourself.
Enter the following commands to load your filesystem and some information GRUB may need.
mount /dev/hda4 /mnt/work
mount -o bind /dev /mnt/work/dev
mount -o bind /proc /mnt/work/proc
cp /proc/mounts /mnt/work/etc/mtab
Now, you have to enter your working environment. The following command will take care of that.
chroot /mnt/work/ /bin/bash
Warning: From this point on, any files you modify will affect your Ubuntu system. You have left the safety of the LiveCD. Exercise caution.
Recovering GRUB Automatically
If you have a separate /boot/ partition, type the following line.
sudo mount /dev/hda3 /boot/
Reinstalling GRUB from this point is easy. Just enter the following command.
sudo /sbin/grub-install /dev/hda
If the command you used above failed, which is unlikely, you will need to configure GRUB manually (it isn't too hard). If it succeeded, you should read the note at the start of the final section: "Configuring the GRUB Menu".
Recovering GRUB Manually
Before you can undertake the next step, it's important that you understand how GRUB identifies partitions.
To GRUB, numbers begin with 0, and letters are expressed numerically, also beginning with 0.
For example, /dev/hda1 is "hd0,0" to GRUB.
Similarly, /dev/hdb3 is "hd1,2".
Note: The "root" line must point to the location of your /boot/ partition if you have one. If you do not have one, point it at your / partition.
sudo /sbin/grub
grub> root (hd0,2)
grub> setup (hd0)
grub> quit
Configuring the GRUB Menu
Note: This step does not need to be done if you're just trying to recover your MBR. Installing Windows will not alter the contents of your existing menu.lst, so if everything was working right before, everything will continue to work right now, and you can restart your computer.
Open the GRUB menu file, /boot/grub/menu.lst, with your favourite text editor. An example follows.
sudo nano /boot/grub/menu.lst
Note: Your menu.lst file is used to control the operating systems GRUB displays on startup, as well as its visual appearance. This howto will only explain how to get your operating systems to boot, it will not tell you how to make your bootloader pretty.
A sample menu.lst, stripped of unnecessary comments, appears below. It is based on the /dev/hda3 and /dev/hda4 example above, and assumes Windows resides at /dev/hda1.
timeout 5 #The number of seconds GRUB should wait before booting an OS
default 0 #The entry which should be booted by default
fallback 1 #The entry which should be booted in the event of the first one failing

title  Ubuntu, 2.6.10 #A 32-bit Ubuntu entry
#This (or something like it) should be in your configuration
root   (hd0,2)
initrd /initrd.img-2.6.10-5-386
kernel /vmlinuz-2.6.10-5-386 root=/dev/hda4

title  Ubuntu, 2.6.10 #Another 32-bit Ubuntu entry
#This is an example of an Ubuntu entry which does not have a separate /boot/ partition
#(it is provided only as an alternate to the example above -- do not use them together)
root   (hd0,2)
initrd /boot/initrd.img-2.6.10-5-386
kernel /boot/vmlinuz-2.6.10-5-386

title  Microsoft Windows XP Home #An entry for a Windows installation
#If you're reading this guide, you probably want this
root   (hd0,0)
makeactive
chainloader +1
And that's it. Save and close the file, then reboot and try out the entries.
GRUB Resources
- GRUB Manual
- GRUB homepage
- GRUB wiki
- | Recovering grub after installing Windows to dual-boot
- Linux+Win+Grub HowTo
- Super Grub Disk - Ready to go cdrom or floppy that restores Grub on MBR automatically
- GRUB for DOS