“UbuntuHelp:MythTV/Install/Server/Backend Frontend”的版本间的差异
来自Ubuntu中文
小 (新页面: {{From|https://help.ubuntu.com/community/MythTV/Install/Server/Backend_Frontend}} {{Languages|UbuntuHelp:MythTV/Install/Server/Backend_Frontend}} Include(MythTV/Setup_Guide_Sources) =...) |
小 |
||
| 第4行: | 第4行: | ||
=== Install MythTV === | === Install MythTV === | ||
A backend will need to have mysql-server installed as well as mythtv-backend. Mythtv-backend doesn't depend on mysql-server since the mysql server can be located elsewhere on your network. Also, if this is a secondary backend, don't install mythtv-database or mysql-server. Just configure this backend to connect to the master backend instead. | A backend will need to have mysql-server installed as well as mythtv-backend. Mythtv-backend doesn't depend on mysql-server since the mysql server can be located elsewhere on your network. Also, if this is a secondary backend, don't install mythtv-database or mysql-server. Just configure this backend to connect to the master backend instead. | ||
| − | + | # Install the mythtv software. | |
| − | + | ||
<pre><nowiki> | <pre><nowiki> | ||
sudo apt-get install mythtv-frontend gdm ubuntu-artwork xterm openbox gnome-screensaver xserver-xorg gsfonts-x11 xfonts-100dpi xfonts-75dpi msttcorefonts xfonts-base mysql-server mythtv-backend mythtv-database usplash-theme-ubuntu | sudo apt-get install mythtv-frontend gdm ubuntu-artwork xterm openbox gnome-screensaver xserver-xorg gsfonts-x11 xfonts-100dpi xfonts-75dpi msttcorefonts xfonts-base mysql-server mythtv-backend mythtv-database usplash-theme-ubuntu | ||
</nowiki></pre> | </nowiki></pre> | ||
| − | + | * Behind the scenes, a mythtv user will be created in PAM as well as mysql. The database will be installed into mysql and the initial configuration performed. | |
| − | + | * You may be asked to configure postfix. Choose the "no configuration" option to skip this, as you won't need postfix for this machine. | |
| − | + | * You will be asked for the password to the root account of mysql. By default, there is no password. | |
| − | + | # If you have a proprietary graphics card driver that you installed earlier, you will need to complete the installation for it right now. | |
| − | + | #* '''Nvidia:''' sudo nvidia-glx-config enable | |
| − | + | #* '''ATI:''' sudo aticonfig --initial | |
| − | + | 2. Now, we will create a session for the automatic mythtv login. Create the file <code><nowiki>/usr/share/xsessions/mythtv.desktop</nowiki></code>. Place these contents into that file: | |
| − | + | ||
| − | + | ||
| − | + | ||
| − | + | ||
| − | + | ||
<pre><nowiki> | <pre><nowiki> | ||
[Desktop Entry] | [Desktop Entry] | ||
| 第30行: | 第24行: | ||
Type=Application | Type=Application | ||
</nowiki></pre> | </nowiki></pre> | ||
| − | + | 3. Create a script, /usr/local/bin/mythtv.sh that will be spawned when you login to your MythTV session. Place these contents into that file: | |
| − | + | ||
| − | + | ||
<pre><nowiki> | <pre><nowiki> | ||
gnome-screensaver | gnome-screensaver | ||
| 第38行: | 第30行: | ||
exec openbox | exec openbox | ||
</nowiki></pre> | </nowiki></pre> | ||
| − | + | * If you are running lirc and using irexec for any of your key detection, you probably also want to add this section. It will be sure that if X is ever restarted, irexec doesn't spawn multiple instances | |
| − | + | ||
| − | + | ||
<pre><nowiki> | <pre><nowiki> | ||
killall irexec | killall irexec | ||
irexec -d | irexec -d | ||
</nowiki></pre> | </nowiki></pre> | ||
| − | + | * If you are running an nvidia graphics card, you should add: | |
| − | + | ||
| − | + | ||
<pre><nowiki> | <pre><nowiki> | ||
nvidia-settings -l | nvidia-settings -l | ||
</nowiki></pre> | </nowiki></pre> | ||
| − | + | * If you are planning on running the myth transcoding daemon for ripping dvds, you will want to add: | |
| − | + | ||
| − | + | ||
<pre><nowiki> | <pre><nowiki> | ||
mtd -d | mtd -d | ||
</nowiki></pre> | </nowiki></pre> | ||
| − | + | * If you come up with anything else for your custom startup script, <code><nowiki>/usr/local/bin/mythtv.sh</nowiki></code> will be the place to add it. | |
| − | + | 3. Be sure to set <code><nowiki>/usr/local/bin/mythtv.sh</nowiki></code> to be executable. | |
| − | + | ||
| − | + | ||
<pre><nowiki> | <pre><nowiki> | ||
sudo chmod +x /usr/local/bin/mythtv.sh | sudo chmod +x /usr/local/bin/mythtv.sh | ||
</nowiki></pre> | </nowiki></pre> | ||
| − | + | 4. Start gdm. | |
| − | + | ||
<pre><nowiki> | <pre><nowiki> | ||
sudo /etc/init.d/gdm restart | sudo /etc/init.d/gdm restart | ||
| 第78行: | 第61行: | ||
|<|1> You will be given an option to make this default. Choose "Just For This Session". || https://help.ubuntu.com/community/MythTV/Install/Server/Backend_Frontend?action=AttachFile&do=get&target=openboxdefault.png | |<|1> You will be given an option to make this default. Choose "Just For This Session". || https://help.ubuntu.com/community/MythTV/Install/Server/Backend_Frontend?action=AttachFile&do=get&target=openboxdefault.png | ||
|} | |} | ||
| − | + | 5. Right click the desktop and choose the terminal. | |
| − | + | ||
{|border="1" cellspacing="0" | {|border="1" cellspacing="0" | ||
|<|1> Right click the desktop and choose "Terminal Emulator". ||https://help.ubuntu.com/community/MythTV/Install/Server/Backend_Frontend?action=AttachFile&do=get&target=rightclick.png | |<|1> Right click the desktop and choose "Terminal Emulator". ||https://help.ubuntu.com/community/MythTV/Install/Server/Backend_Frontend?action=AttachFile&do=get&target=rightclick.png | ||
|} | |} | ||
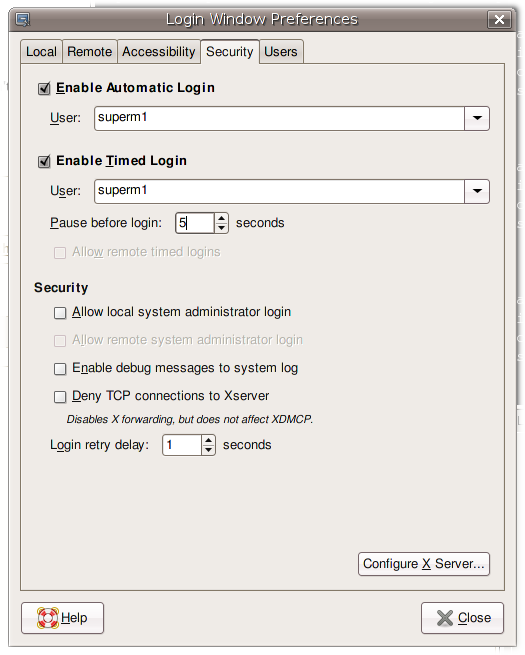
| − | + | 6. Run gdmsetup. | |
| − | + | ||
<pre><nowiki> | <pre><nowiki> | ||
sudo gdmsetup | sudo gdmsetup | ||
| 第91行: | 第72行: | ||
|<|1> Gdmsetup is used to configure an automatic login for your main user name (in this case <code><nowiki>superm1</nowiki></code>) as well as a time delayed login if you logout. This will make the bootup a lot more streamlined (especially for HTPC use) ||https://help.ubuntu.com/community/MythTV/Install/Server/Backend_Frontend?action=AttachFile&do=get&target=gdmsetup2.png | |<|1> Gdmsetup is used to configure an automatic login for your main user name (in this case <code><nowiki>superm1</nowiki></code>) as well as a time delayed login if you logout. This will make the bootup a lot more streamlined (especially for HTPC use) ||https://help.ubuntu.com/community/MythTV/Install/Server/Backend_Frontend?action=AttachFile&do=get&target=gdmsetup2.png | ||
|} | |} | ||
| − | + | 7. [[Include(MythTV/Install/mythtv-group)]] | |
| − | + | 8. [[Include(MythTV/Install/Server/mysql)]] | |
| − | + | 9. [[Include(MythTV/Install/Server/BackendDesktop/run-mythtv-setup)]] | |
| − | + | 10. [[Include(MythTV/Install/fill-database)]] | |
| − | + | 11. [[Include(MythTV/Install/start-backend)]] | |
| − | + | 12. Right click the desktop and log out of the openbox session. | |
| − | + | ||
| − | + | ||
| − | + | ||
| − | + | ||
| − | + | ||
| − | + | ||
{|border="1" cellspacing="0" | {|border="1" cellspacing="0" | ||
|<|1> Right click the desktop and choose "Exit". ||https://help.ubuntu.com/community/MythTV/Install/Server/Backend_Frontend?action=AttachFile&do=get&target=rightclick2.png | |<|1> Right click the desktop and choose "Exit". ||https://help.ubuntu.com/community/MythTV/Install/Server/Backend_Frontend?action=AttachFile&do=get&target=rightclick2.png | ||
|} | |} | ||
| − | + | 13. Set the newly created MythTV session to be the default. This will make sure that on the next reboot, MythTV comes up by default. | |
| − | + | ||
{|border="1" cellspacing="0" | {|border="1" cellspacing="0" | ||
|<|1> At the bottom left, choose Options. Pick "Select Session". || https://help.ubuntu.com/community/MythTV/Install/Server/Backend_Frontend?action=AttachFile&do=get&target=optionsbutton.png | |<|1> At the bottom left, choose Options. Pick "Select Session". || https://help.ubuntu.com/community/MythTV/Install/Server/Backend_Frontend?action=AttachFile&do=get&target=optionsbutton.png | ||
| 第117行: | 第91行: | ||
|<|1> You will be given an option to make this default. Choose "Make Default". || https://help.ubuntu.com/community/MythTV/Install/Server/Backend_Frontend?action=AttachFile&do=get&target=mythtvdefault.png | |<|1> You will be given an option to make this default. Choose "Make Default". || https://help.ubuntu.com/community/MythTV/Install/Server/Backend_Frontend?action=AttachFile&do=get&target=mythtvdefault.png | ||
|} | |} | ||
| − | + | * Note: at least one user had difficulties logging out of the openbox session to return to the login screen. If you encounter similar issues, you should try to first restart GDM. | |
| − | + | ** Switch to virtual terminal 1 (CTRL-ALT-F1) | |
| − | + | ** Login | |
| − | + | ** Restart GDM | |
| − | + | ||
<pre><nowiki> | <pre><nowiki> | ||
sudo /etc/init.d/gdm restart | sudo /etc/init.d/gdm restart | ||
</nowiki></pre> | </nowiki></pre> | ||
| − | + | * If restarting GDM didn't work, reboot your machine to see if GDM comes up after the fresh boot. | |
[[category:UbuntuHelp]] | [[category:UbuntuHelp]] | ||
2007年11月30日 (五) 20:40的版本
| 点击翻译: |
English |
Include(MythTV/Setup_Guide_Sources)
Install MythTV
A backend will need to have mysql-server installed as well as mythtv-backend. Mythtv-backend doesn't depend on mysql-server since the mysql server can be located elsewhere on your network. Also, if this is a secondary backend, don't install mythtv-database or mysql-server. Just configure this backend to connect to the master backend instead.
- Install the mythtv software.
sudo apt-get install mythtv-frontend gdm ubuntu-artwork xterm openbox gnome-screensaver xserver-xorg gsfonts-x11 xfonts-100dpi xfonts-75dpi msttcorefonts xfonts-base mysql-server mythtv-backend mythtv-database usplash-theme-ubuntu
- Behind the scenes, a mythtv user will be created in PAM as well as mysql. The database will be installed into mysql and the initial configuration performed.
- You may be asked to configure postfix. Choose the "no configuration" option to skip this, as you won't need postfix for this machine.
- You will be asked for the password to the root account of mysql. By default, there is no password.
- If you have a proprietary graphics card driver that you installed earlier, you will need to complete the installation for it right now.
- Nvidia: sudo nvidia-glx-config enable
- ATI: sudo aticonfig --initial
2. Now, we will create a session for the automatic mythtv login. Create the file /usr/share/xsessions/mythtv.desktop. Place these contents into that file:
[Desktop Entry]
Encoding=UTF-8
Name=MythTV
Comment=Use this session to run MythTV
Exec=/usr/local/bin/mythtv.sh
Icon=
Type=Application
3. Create a script, /usr/local/bin/mythtv.sh that will be spawned when you login to your MythTV session. Place these contents into that file:
gnome-screensaver
mythfrontend&
exec openbox
- If you are running lirc and using irexec for any of your key detection, you probably also want to add this section. It will be sure that if X is ever restarted, irexec doesn't spawn multiple instances
killall irexec
irexec -d
- If you are running an nvidia graphics card, you should add:
nvidia-settings -l
- If you are planning on running the myth transcoding daemon for ripping dvds, you will want to add:
mtd -d
- If you come up with anything else for your custom startup script,
/usr/local/bin/mythtv.shwill be the place to add it.
3. Be sure to set /usr/local/bin/mythtv.sh to be executable.
sudo chmod +x /usr/local/bin/mythtv.sh
4. Start gdm.
sudo /etc/init.d/gdm restart
| 1> At the bottom left, choose Options. Pick "Select Session". | 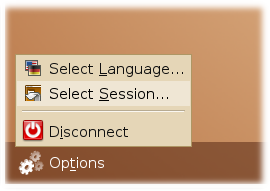
|
| 1> When Given a list of sessions, choose Openbox. | 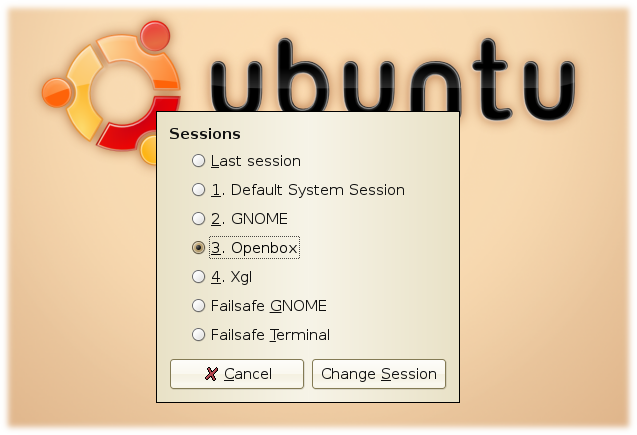
|
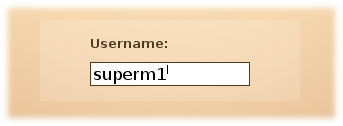
1> Login as the user created at installation, NOT mythtv. The mythtv user is only used for the backend process. |
|
| 1> You will be given an option to make this default. Choose "Just For This Session". | 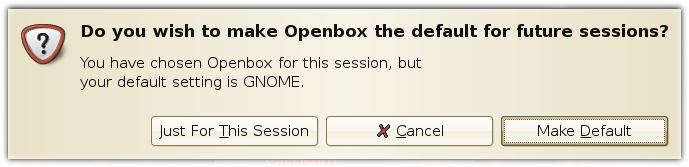
|
5. Right click the desktop and choose the terminal.
| 1> Right click the desktop and choose "Terminal Emulator". | 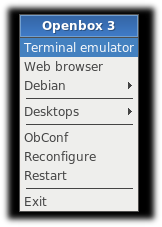
|
6. Run gdmsetup.
sudo gdmsetup
1> Gdmsetup is used to configure an automatic login for your main user name (in this case superm1) as well as a time delayed login if you logout. This will make the bootup a lot more streamlined (especially for HTPC use) |
|
7. Include(MythTV/Install/mythtv-group) 8. Include(MythTV/Install/Server/mysql) 9. Include(MythTV/Install/Server/BackendDesktop/run-mythtv-setup) 10. Include(MythTV/Install/fill-database) 11. Include(MythTV/Install/start-backend) 12. Right click the desktop and log out of the openbox session.
| 1> Right click the desktop and choose "Exit". | 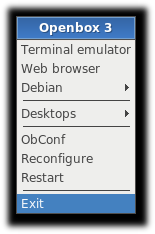
|
13. Set the newly created MythTV session to be the default. This will make sure that on the next reboot, MythTV comes up by default.
| 1> At the bottom left, choose Options. Pick "Select Session". |
|
| 1> When Given a list of sessions, choose MythTV. | 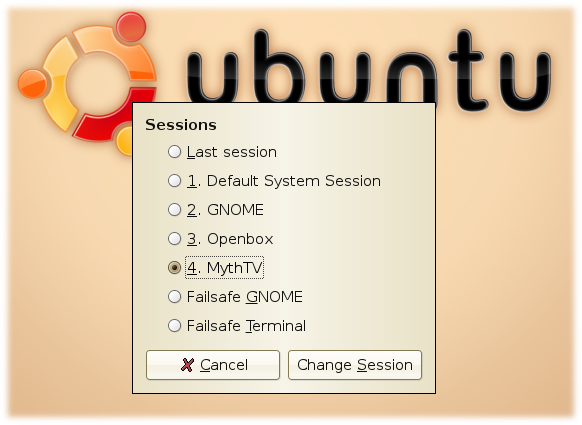
|
1> Login as the user created at installation, NOT mythtv. |
|
| 1> You will be given an option to make this default. Choose "Make Default". | 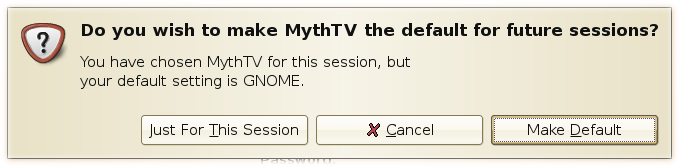
|
- Note: at least one user had difficulties logging out of the openbox session to return to the login screen. If you encounter similar issues, you should try to first restart GDM.
- Switch to virtual terminal 1 (CTRL-ALT-F1)
- Login
- Restart GDM
sudo /etc/init.d/gdm restart
- If restarting GDM didn't work, reboot your machine to see if GDM comes up after the fresh boot.